You might think that after all the insulation upgrades in your attic to modern standards, sealing every possible air leakage, you still experience cold drafts, ice dams, and high heating bills. The melting of snow at your roof edges and the formation of ice at gutters are probably caused by the so-called heat loss through thermal bridging, which is a hidden and often neglected type of heat loss that happens in buildings.
Thermal insulation is paramount in preventing much heat loss, though at the same time, thermal bridges act like stealthy robbers stealing heat from your home, and they are especially troublesome during the long cold winter.
This blog will walk you through bridging, its importance in roofs, and—more importantly—how to eliminate it permanently.
Why Are Roofs Prone to Thermal Bridging?
The roofing assembly consists of many types of building materials. Thermal Bridges exhibit all of the properties of typical roofs.
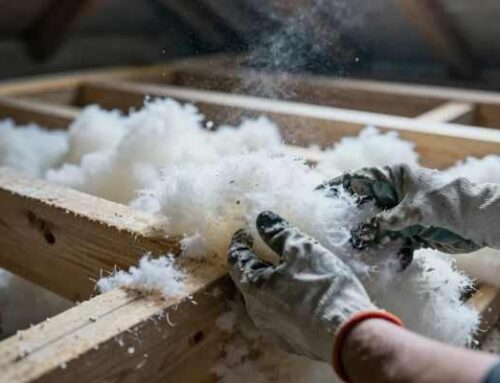
Wood Rafters and Trusses – Most Common Thermal Bridges
Wood facilitates thermal transfer or conduction three times quicker than typical roofing materials, which, to most roof designers, represents a significant thermal pattern on the roof (as viewed through thermal imaging) where wood rafters, trusses, etc., lose heat as seen by the bright colors of these areas.
Structural Components of Roof Assembly
The roof assembly contains structural components, such as the ridge pole, hip rafters, etc. In addition to these, the roof assembly is also penetrated by other structural components such as metal fasteners. All of these components create Thermal Bridging Areas, where the insulation has a gap in the thermal envelope.
Metal Fasteners and Penetrations
Thermal Bridging Areas are created by metal fasteners, pipes, ducts, electrical, and other mechanical components that lose their insulation or thermal value, hence creating additional thermal bridges. The use of no-thermal-bridging materials, such as stainless steel screws, will help to cut down on heat flow through the insulation to the metal, thus lowering thermal bridging.
Knee Walls and Eaves
Knee Walls and Eaves will have complex shapes not usually built continuously. In addition, these areas will tend to contain, at the very least, the same number of Thermal Bridging Areas as the total number of components within the Roof Assembly.
The Winter Results Are Disastrous:
Greatest Heat Loss: Thermal bridging has been shown in the studies to lower the insulation effectiveness in total by 15-30%. The result is you are essentially heating the outside.
Ice Dams & Water Damage: The heat escaping through the rafters is a signal that the snow is melting. The water that has melted runs to the cold eaves and refreezes, forming ice dams. Water that is trapped then goes back up under the shingles.
Condensation & Black Mold: When the warm, moist indoor air comes into contact with the cold surface of a thermal bridge (e.g. rafter bay in the attic), condensation occurs. This moisture which is not visible causes wood to rot, creates mold in the roof structure, and results in poor indoor air quality.
Ceilings are Cold & Discomfort: You could be feeling drafts or even noticing certain rooms that are alwaysice-cold, no matter how much heat is on.
How to Identify Thermal Bridges in Your Roof
The Infrared Camera Test: This is the most definitive method. A professional energy auditor or inspector uses a thermal imaging camera to visually map temperature differences on your interior ceilings or attic sheathing. The bridges show up as bright (warm) lines against a darker (colder) background on a cold day.
The Visual Clue – Ice Dams: If you have recurrent ice dams along your eaves, especially on a “well-insulated” home, thermal bridging through the rafters is a prime suspect.
The Touch Test (Carefully): On a very cold day, touch your interior ceiling. If you are able to sense slight stripes or spots that are much colder, you could be perceiving the arrangement of the rafters behind the plasterboard.
Solution 1: Exterior Rigid Foam Insulation (The “Overcoat” Method):
Most Suitable for:
Aural new roofs, remodelling, or retrofitting.
How It Works:
When installing a new roofing surface or removing the shingles from an existing roofing deck during a re-roof job, a layer of rigid foam board insulation (XPS, Polyiso, EPS) is placed directly on top of the existing sheathing that is exposed after installing the existing shingle cover. New framing and roofing will then be installed over the top of the insulation layer.
Why It Works:
This creates an uninterrupted thermal barrier around the entire perimeter of the building. The rafter space is now located on the heated side of the insulation board. This creates a complete thermal break and prevents heat buildup in the attic space resulting in ice damming, and the water-based portion of the roof deck will not develop cold spots as a result of ice dams.
Considerations:
There are design changes needed to accommodate the new roof covering; new roof flashings, rakes, eaves, etc. The general principle used to accomplish this design is similar to that used to create a hot roof assembly; either through the use of a venting system or through the use of closed “hot” air spaces.
Solution 2: Insulated Roof Sheathing:
Ideal application:
New buildings or roof replacement.
Operating principle:
Instead of the conventional plywood/OSB, roofing with rigid foam bonded to it is utilized. This technique combines structure and insulation in one operation.
Why It Works:
Ensures an unbroken R-value increment that conceals the rafters.
Solution 3: Roof Deck Spray Foam Insulation:
Best for:
The conversion of the attic for living space, usage of cathedral ceilings, or the case of seeking an unvented attic.
How it operates:
Closed-cell spray foam is applied to the bottom of the roof sheathing directly, thus filling the area of the rafters completely and sticking to the wood.
Reasons for its efficiency:
The foam’s R-value is higher than that of batt insulation, so it completely envelops the rafters, which stops the air leaks and brings down the thermal bridging. Additionally, it makes a conditioned attic space.
Limitations:
Costlier than batt insulation. A professional installer is required. It results in an unvented assembly that will demand thorough and precise planning for moisture control.
Professional Guidance is Key:
Rooftop systems are intricate systems in which successful moisture management is vital. When conducting any significant remodel involving an unvented roof (and using spray foam), an architect, contractor or insulation contractor who understands your particular climate zone must design the modifications.
Conclusion
The cutting edge of energy efficiency in houses is the determination of thermal bridges. While filling the cavities with insulation is a start, actually creating a continuous thermal envelope separates good houses from the true high-performing, durable, and comfortable homes. Because you are addressing a concealed hazard (a thermal bridge), you will not only reduce your heating costs today, you will also create healthier, stronger buildings that will endure the rigours of winter for many years.