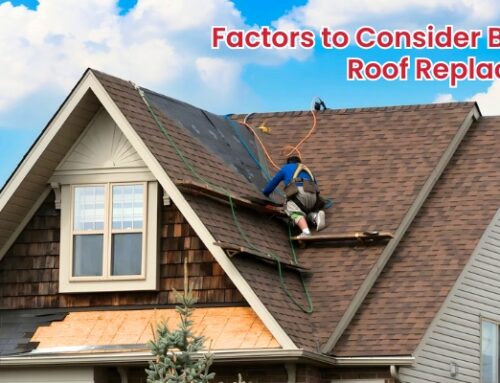
Changing your roof is a major home improvement project – and one should not be taken lightly. Whether your roof has reached the end of your lifetime or has faced storm damage, jumping into a replacement without a proper plan can lead to unexpected cost and disappointi\ng failure. That is why it is necessary to have a roof replacement checklist. This not only helps you stay organized, but also ensures that you are asking the correct question and covering all the important details before committing to a contractor. In this post, we will run you through all the things you need to know – from doing research and verifying the credentials to understand the warranties and underline the project timeline – so you can move forward with confidence and peace of mind.
However, before signing a contract, it is necessary to be well-informed and prepared. This article presents a comprehensive roof replacement checklist designed to guide the owners of the house through the important stages required for a successful project. By understanding the types of roofing materials available to verify the contractor’s credentials and acquire appropriate permits, each item on this checklist serves to empower the owners of the house. Being active and hardworking in your approach, homeowners can avoid general loss and ensure that their roof project meets both budgetary and quality expectations. Whether you are working with storm damage, age-related wearing down, or simply demanding a change, this checklist will equip you with knowledge and equipment to make informed decisions, eventually leading to a roof that not only protects your house, but also increases its value.
1. Contractor Verification Essentials
- Demand to see physical copies of all licenses and confirm they’re current with your state’s licensing board – don’t settle for verbal assurances
- Require certificates of insurance showing both general liability coverage and workers’ compensation – call the insurer to verify active policies
- Research manufacturer certifications like GAF Master Elite, which require rigorous training and background checks
- Verify at least 5 years of local operation by checking business filings and online reviews across multiple platforms
2. Comprehensive Scope of Work Details
- The contract must specify exact product lines down to the model numbers – “architectural shingles” is too vague
- Include written confirmation of complete tear-off removal, including all old underlayment and nails – no shortcuts
- Specify premium synthetic underlayment instead of basic felt paper for better moisture protection
- Require detailed flashing plans showing metal types and installation methods at all penetrations
3. Warranty Fine Print Examination
- Obtain copies of both the manufacturer’s material warranty and the contractor’s workmanship guarantee
- Clarify if the warranty is transferable to future homeowners if you sell the property
- Understand all maintenance requirements, like mandatory annual inspections, to keep coverage valid
- Get written confirmation of what actions (like pressure washing) would void the protection
4. Payment Schedule Safeguards
- Never pay more than 10% as an initial deposit before work commences
- Schedule the largest payment (40-50%) only after the complete installation and your final inspection
- Require signed lien waivers with each payment to protect against subcontractor claims
- Use credit cards when possible for additional consumer protection on deposits
5. Site Protection and Cleanup Terms
- Specify magnetic roller sweeps of the entire property, including adjacent planting beds
- Require daily debris removal with photographic proof of dumpster contents
- Include landscaping protection clauses with per-plant replacement costs for damage
- Detail tarping procedures for protecting windows, AC units, and exterior fixtures
6. Compliance Documentation
- Confirm who obtains permits and verify they’re posted before work begins
- Get HOA approval letters in writing if you’re in a governed community
- Require the contractor to schedule and accompany the final building inspection
- Keep copies of all disposal receipts to prove proper material recycling
7. Pre-Installation Home Preparation
- Remove all wall decorations and secure fragile items throughout the house before demolition
- Cover attic contents with plastic sheeting secured with at least 6 mil thickness
- Notify security companies if you have monitored alarms that vibration might trigger
- Make arrangements for children and pets to be off-site during the noisiest work days
8. Final Inspection Protocol
- Conduct both ground-level and attic inspections with the project foreman present
- Test random shingles for proper adhesion by attempting to lift edges gently
- Verify uniform nail placement patterns in different roof sections
- Check that all vents and flashings have proper clearance and sealing
9. Post-Installation Requirements
- Obtain the completed manufacturer warranty registration within 30 days
- Schedule a follow-up inspection after the first major rain event
- Keep all documentation in a fireproof safe, including before/after photos
- Create calendar reminders for annual warranty inspections
Critical Questions for References
- Can you describe how the crew handled unexpected structural issues when they arose during your project?
- What specific cleanup measures did they take to protect your landscaping and exterior surfaces?
- How responsive were they to addressing minor concerns during the warranty period?
Pro Tip: Insist on meeting the actual crew foreman – not just the salesperson – before signing to assess their professionalism and communication style.
Conclusion
If a contractor checks all these boxes, you’re likely making a solid choice. But if anything feels off, trust your gut.
Need help finding a trusted local roofer? Ask neighbors for referrals or check your local home builders’ association for certified pros. Your roof is too important to leave to chance—use this checklist, and you’ll get a roof that lasts for decades.